[You can skip ahead to my “how-to replace the screen” part below if you like]
A bit of background about the Essential Phone PH-1.
You can read my other post about the Essential Phone PH-1 and why I like it. However, I like the misleading titanium enclosure and drop test quite a bit less.
Remember the titanium enclosure? This is the official drop test video:
And this is what that titanium enclosure looks like after the drop test. It looks almost perfect, especially compared to the other devices:
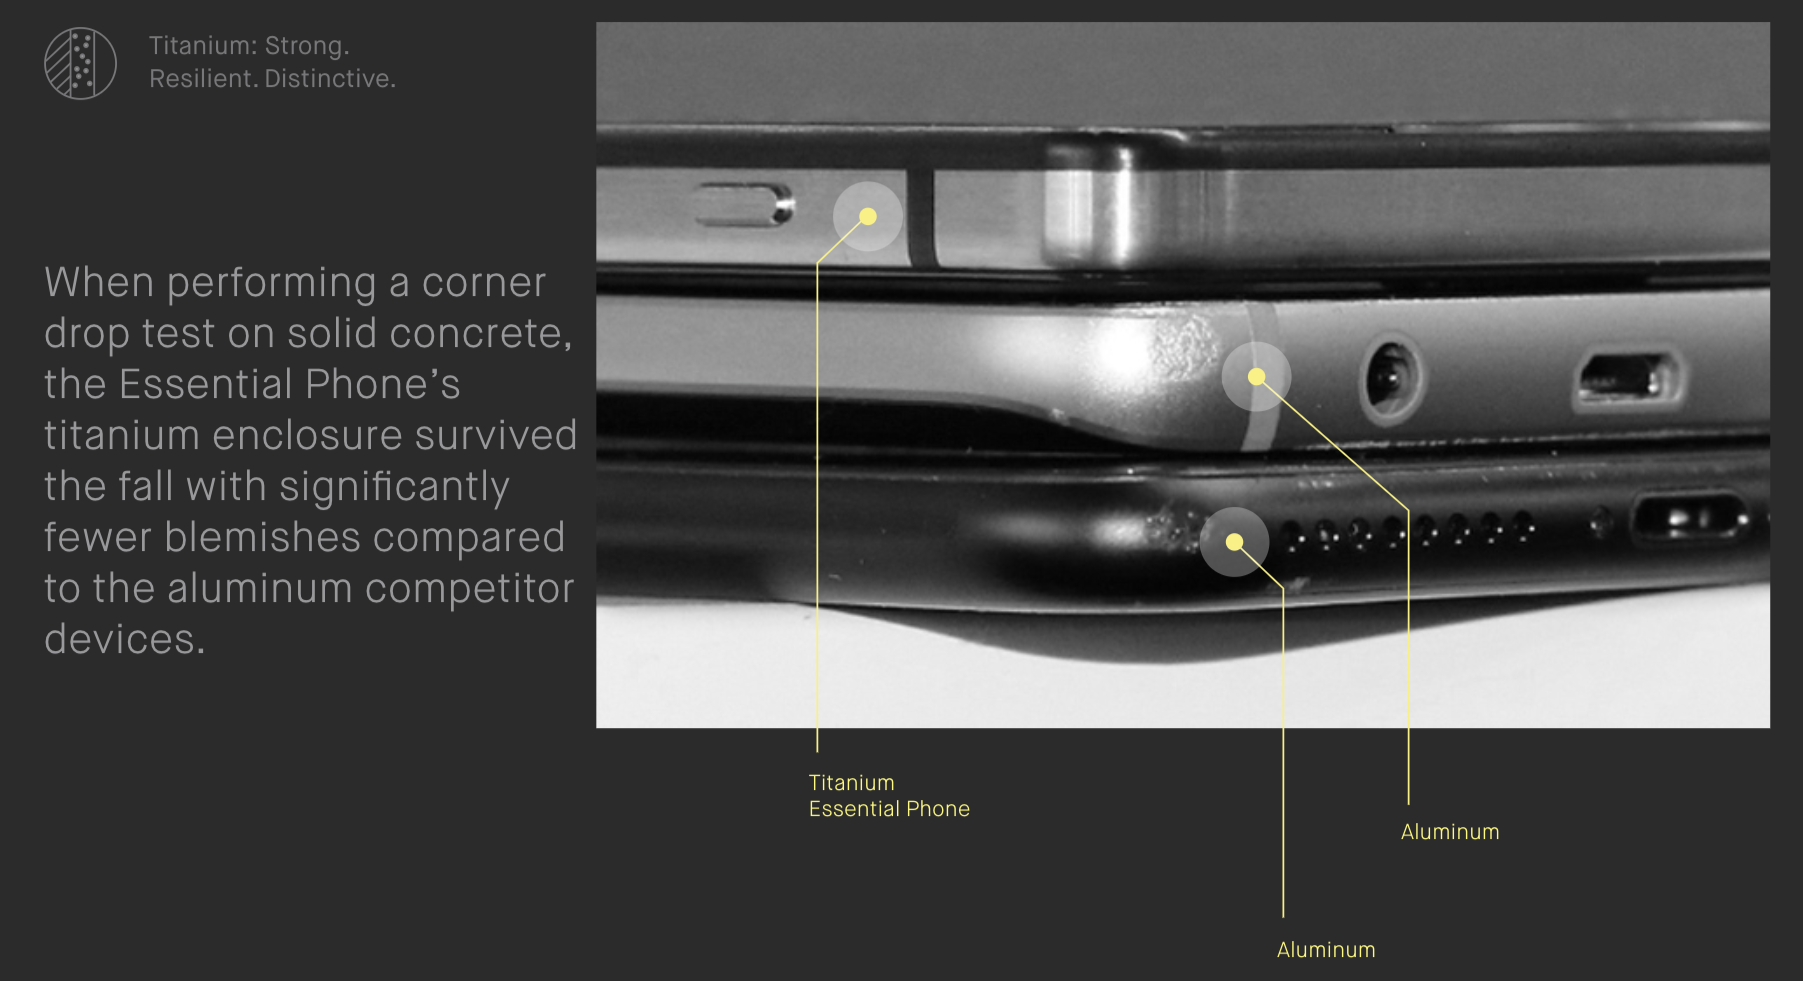
I performed this very same drop test at Home Depot on the concrete floor of the outdoor garden department. It landed perfectly at a 45 degree angle right on the corner, just like the video. The corner still looks great, and the scuff marks are barely noticeable. Amazing!
However, slightly less amazing is the thoroughly cracked screen with missing pieces of glass in the corner (and slightly exposed electronics). But boy howdy! Look at that titanium! Sheesh.
Which brings me finally to the topic of this post: How to easily replace a damaged screen on the Essential Phone PH-1
I replaced the screen myself and it was extremely easy:
– I bought a PH-1 screen replacement and full-kit from Amazon for $43 (link)
– I browsed these two short and painless videos. In fact, it was easier than the videos showed because I used a hairdryer to melt the glue.
– The PH-1 screen replacement and full-kit comes with a plastic tool that I used to simultaneously cut the glue and pry out the damaged screen. It was much, much faster and easier than the videos for that part.
– I didn’t use rubber bands to hold the screen down while the glue dried. Instead I used 6 simple and cheap spring clamps and put paint sticks (a.k.a. big tongue depressors) between the clamp and screen to prevent problems.